In case you have installed the updates for Nvidia driver and you regret your decision, then knowing how to roll back Nvidia drivers Windows 10 would be a crucial knowledge. You see, Nvidia has released driver updates to deal with glitches and then increase its graphic cards’ performance. Of course, users are ecstatic about it. But the new update has caused performance problems as well as a blue screen of death after the installation. That’s why the users are ‘forced’ to roll back their driver to the previous version. How do you manage it?
Using Device Manager
If you want to know how to roll back Nvidia drivers Windows 10 with the Device Manager, here are the steps to do so.
- You need to press Windows Key and R buttons at the same time so you can open Run
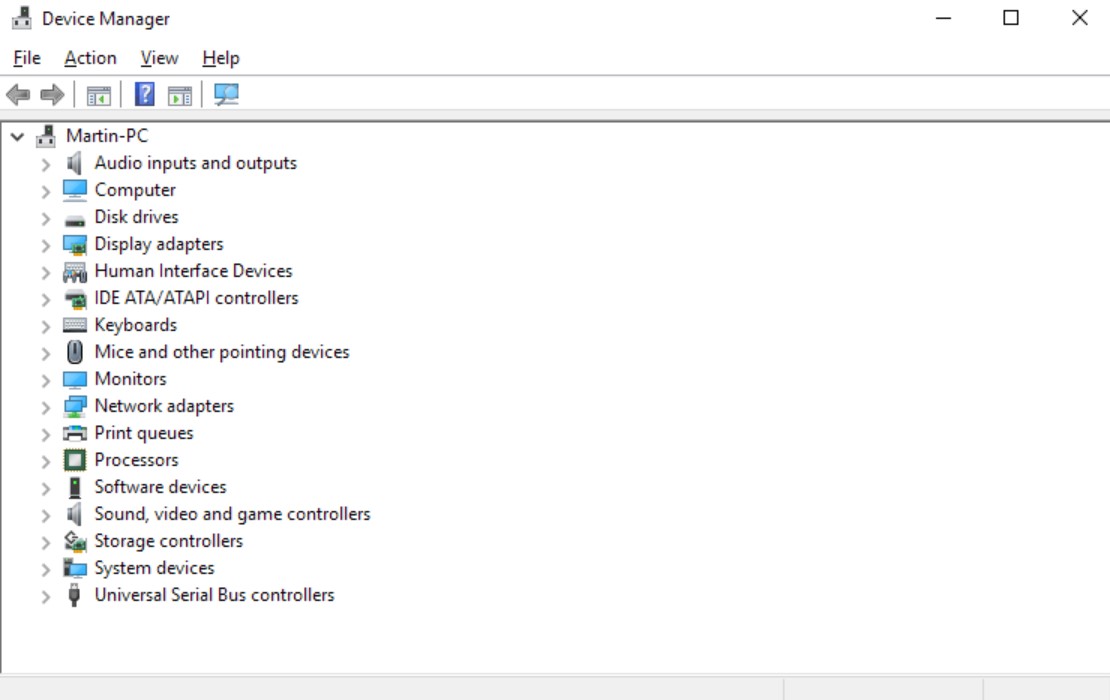
- Then type in ‘devmgmt.msc’ and click OK. By doing this, you open the Device Manager
- Within Device Manager, go to Display Adapter category and expand it
- Choose Nvidia Graphic Device and then right-click it. You should see the option Properties. Choose it
- When Properties window has opened, open the tab Driver
- Write down the version and the date
- Then choose the button for Roll Back Driver
- When the Driver Package rollback window has been opened, choose any reason and then choose Yes
- Once you have clicked Yes, Windows will go back to the previous version of the driver
- When it completes, open the tab Driver again. Check the driver version and date to ensure that the process is successful
Using Display Driver Utility
You can also use this utility to roll back to the previous version. These are the stages:
- You need to make sure that you have downloaded the last (working) version of Nvidia driver
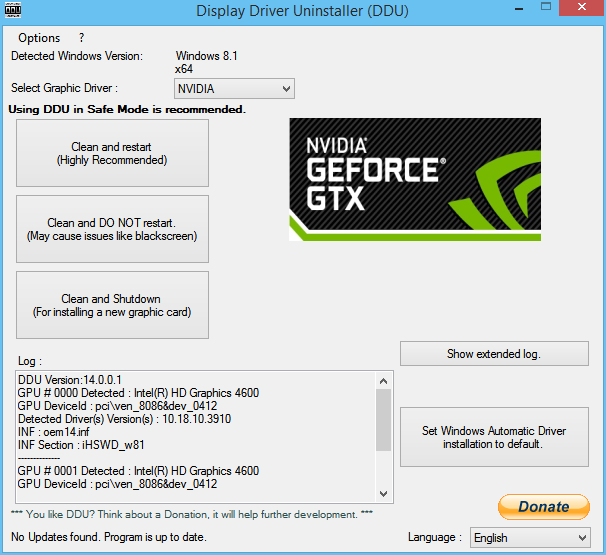
- Download Display Driver Uninstaller Utility and then extract the file
- Click DDU.exe file. Update it when required (by the tool)
- Click the button Launch
- There will be a drop-down menu. There will be a Selected Graphic Driver section. Choose Nvidia under it.
- Choose Clean and Reinstall Button. But before clicking further, you want to close other programs. Save the data so you won’t lose them.
- The DDU will then uninstall ALL Nvidia graphic drivers and then restart the computer
- You can now install the driver (you can take it from the Nvidia site). Simply double click the format exe
- Choose Custom installation, and then move on to Perform Clean Installation
- When the installation has started, you can restart the computer. Check whether the problems that were caused by the (previous) driver have been resolved.
Final Words
The rollback process is quite easy as long as you follow the directions – to the letter would be better. You can use either the DDU Utility or the Device Manager – it is up to you. If the button for Roll Back Driver is grayed out, you will have to do the process manually. It’s because the computer can’t find the previous driver within your system.
Knowing how to roll back Nvidia drivers Windows 10 properly and correctly isn’t difficult, but make sure to follow everything to the letter.